Monday, April 29, 2013

Online Storytime

 
This is too important to pass up. I like to promote reading on my blog and I saw this on Pinterest and couldn't resist passing it on to my readers. Go to Barnes and Noble Online Story Time and enjoy all the beautiful books narrated by their authors or famous celebrities.
 
Happy reading from Fran and Friends!! Enjoy!!

Saturday, April 27, 2013

Melted Bead Barrettes

I found this idea on Pinterest and fell in love with it. Can't wait for my niece to come down so we can make some barrettes and jewelry,maybe a few headbands.

We already tried melting beads. We made beaded sun catchers. The smell was really strong so when I do this I plan to set my toaster oven on a table out back in my yard so the smell doesn't make me and my daughter sick (like it did with the sun catchers.)

**If you are sensitive to smells too you might want to take this into consideration.

Tutorial For Melted Bead Barrettes

Also visit Desiree's blog and see all her great ideas.

Books available about beads--

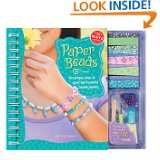
Paper Beads: Turn Simple Strips of Paper into Beautiful Beaded Jewelry (Klutz) [Spiral-bound]

No one will guess these posh beads are made of paper. Paper Beads comes with 200 precut strips of beautifully designed paper in 22 colors and patterns and a custom tool for winding them into beads. Super-clear how-to's make it easy to create straight beads, round beads, simple beads, and fancy beads. A bottle of durable glaze gives each bead a polished finish, and inside the book, we show how to bring it all together in style. Supplies also include elastic cord and a selection of pretty glass accent beads.


Emma And The African Wishing Bead
 
Emma and the African Wishing Bead is a story about two girls, separated by an ocean and united by their dreams. It is about the beauty we all have to offer the world when we follow our passions, believe in ourselves, and unleash our true potential.


Happy Crafting and Happy Reading!!

Thursday, April 25, 2013

DIY Chalk Board Paint

Chalkboard Paint is expensive. It seems to be quite the rage right now. Seems like every time I look in a magazine or on a website I'm seeing something about chalkboard paint. Even my 19 year old wanted one of her walls painted with chalk board paint. (Go figure!)


Well here's a super duper easy recipe that only has two ingredients.
Here's what you will need:
  • Paint (Any color )
  • Non-Sanded Tile Grout
Directions: Mix 1 cup of paint with 2 Tablespoons of grout. Stir really well to get all the lumps and bumps out.

Have fun and enjoy!!

Books related to chalk---


Chalk
A rainy day. Three kids in a park. A dinosaur spring rider. A bag of chalk. The kids begin to draw. . . and then . . . magic! The children draw the sun, butterflies, and a dinosaur that amazingly come to life. Children will never feel the same about the playground after they experience this astounding wordless picture book and the power of the imagination. Bill Thomson embraced traditional painting techniques and meticulously painted each illustration by hand, using acrylic paint and colored pencils. Available on Amazon


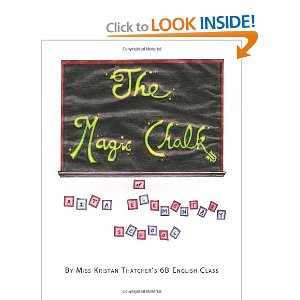
The Magic Chalk of Rita Elementary School An entertaining tale, in both Marshallese and English, of what happens to two students who happen upon a piece of magic chalk while cleaning up after school one day. Written and illustrated by students as part of The Unbound Bookmaker Project. Available on Amazon


Happy Crafting and Reading from Fran and Friends! 


Monday, April 15, 2013

Fuzzy Flip Flops

With summer soon approaching I wanted to share a fun activity that I plan to do with my neice when she visits this summer.

She's a real "girly girl" and so my daughter and so we thought she might like to do this activity. We are going to make some furry flip flops. I found two instructions for these,one is using a single crochet and the other you have to wrapy tightly.

Materials needed:

Crochet Instruction
  • Lettter J needle
  • Craft Yarn (something furry,chennille)
  • Plain flip flops (they have some at the dollar store,Walmart etc..)
Manual wrapping method
  • Craft yarn (something furry,chennille)
  • Glue gun and glue sticks
  • Plain flip flops
Have fun. They are so pretty!!


Saturday, April 13, 2013

Sticks & Stones Pebble Plaque

I have to be honest with you I found this great idea on Pinterest. I love,love,love that site. I've discovered and tried so many great ideas from Pinterest. My home looks all the better for it too. I'm literally hopelessly addicted (thanks Jenn! =smile=).
If you haven't tried Pinterest,check it out and I promise once you start you will be hooked. They have EVERYTHING under the sun from crafts, food,sewing,DIY projects,gardening,reupholstering, even decorating ideas...whatever you need can find it there. If you don't see it type it in their search engine and you will most likely find it on Pinterest.                         
 
Here is one I found on Pinterest. This craft is called Sticks & Stones Pebble Plaque. You will need to go outside and search for rocks with your child or possibly buy some from the dollar store. You know everything is available now a days for a price. If I can find marbles this will be my choice.
 
Here are your supplies:
  • 3 cups flour
  • 1 cup salt
  • 1.25 cups water (plus up to 1/4 cup more)
  • Pebbles and rocks or maybe some colorful marbles from the dollar store.
    Put ingredients in large bowl and mix the ingredients together on medium until ball forms, if crumbly then add more water. Knead until smooth. Divide into 3 balls and place each on foil and flatten to a disc. Press pebbles/sticks into the dough. Heat in oven at 275 degrees on backing sheet for 2 hours then let cool.


      Friday, April 12, 2013

      Liquid Side Walk Chalk

      For those young ones I just couldn't resist this looked like so much fun. I wished I had small kids to give it a try.

      I read on several sites that you can paint with brushes or even put into bottles and spray it but that may be difficult I think for little hands. Maybe a squirt bottle with a thin squirt top would work great too.

      Liquid Sidewalk Chalk
      • 1 cup water
      • 1 cup cornstarch
      • food coloring (any colors you desire!!)
      For directions http://smashedpeasandcarrots.blogspot.com/2009/09/liquid-sidewalk-chalk.html BTW,this is a great blog for Moms with kids. Love her ideas and wanted to share. 

      Thursday, April 11, 2013

      DIY easy to make birdbath


      This is a very easy project that you can help the little ones make and then spend hours of fun watching the birds frolic in your backyard while you teach them about nature. Anyways...it's nice to think of our feathered friends.

      Here's what you will need to complete this project:

      • grapevine wreath (you can find these for a $1. at the dollar store)
      • twine (again at the dollar store)
      • swallow plastic bowl (.88 cents Walmart)
      • Plastic leaves (I cut a few leaves off of something I had laying around the house.)
      • large metal ring
      • florist wire
      • drill
      Basically this picture is self explanatory. What you want to do is basically make a hanging basket type thing using 3 strings of the twine. I cut mine 54 inches each so that I'd have enough to tie on a tree. First I looped the strings of twine through the ring and then all you have to do is basically knot them at the bottom.

      Once knotted place your wreath inside the hanger and then place the bowl inside of the wreath. I drilled three holes into my plastic plate and used a little bit of florist wire to secure the plate inside so it was more stable or wouldn't blow out of the wreath. I didn't want to give the poor birds a heart attack if a strong wind came along. (I wish I would have gotten a picture of mine but I gave it to a friend and didn't get one before doing so.) You can fill with water or even food---it's up to you.

      Monday, April 8, 2013

      Cheap DIY Art

      This project can really be for anyone. You can even let your little ones help you out as there isn't anything harmful on this one. The little ones will enjoy helping with the stickers of course.

      I recently had my bathroom painted and wanted new art for my bathroom. I was sick and tired of looking at the old stuff and decided to do something new but my budget was limited.

      My shower curtain has big daisies on it so I found these decals at the dollar store and I bought three frames. In this big frame (on the right) I turned the paper over that comes with the frame and just stuck the stickers randomly to the paper and then cleaned the glass and put it back together. The photo was taken with my cell phone so it isn't the best quality but in person the art work is very clear.

      In the two smaller frames I used card stock and the mat that came with the frames. I did basically the same thing on these two as well. I just used less of the stickers.

      The flowers tied in really nice with my shower curtain and the colors. The black frames just really made the colors pop and keep it really clean looking too.


      The entire project cost me:
      $8.00

      Each of the smaller frames I got from the dollar store--$1. each
      Decals-$1. for the sheet
      Large 11x14 frame was $5.00 from Walmart

      Sunday, April 7, 2013

      Recycled Magnets and One Direction

      My daughter loves One Direction and all those fan items are so darn expensive. So as a single Mom, I am always looking for ways to make things and save money. I had a bunch of these large over sized magnets on my fridge advertising anything from corn dogs to insurance so I went to the dollar store and bought some photo paper and made some new magnets  recycling the old ones.


      Here's what you will need:
      • Photo Paper (As I said I bought mine for a $1.00 from the dollar store and I always grab a few to keep on hand for projects)
      • Craft Glue (Something good like Alleene's tacky glue---it's about $2 at Walmart for the small one)
      • Old magnets from your fridge
      • Scissors
      • Computer (Go online and choose the photo you want for your magnet and print it or print from your folder on your computer
      Have fun with it. Make them for yourself. Give them to your friends for gifts. Just have a good time!!


      Tuesday, April 2, 2013

      Partridge Art Work

      Materials Needed:

      • Burlap
      • Colored fabric
      • Colored buttons
      • Green felt
      • Green duster (from dollar store or some fake grass
      • Old frame
      • Cardboard
      • Glue gun
      • Glue sticks
      • Twigs or pipe cleaners for legs
      • A few bugle beads

      Measure your cardboard and cut it to the size of your frame. (You won't need the glass). Spread burlap over cardboard and glue into place. You can also help secure it with a few pieces of duck tape or masking tape. Once the burlap is secured onto cardboard you are ready to begin.

      I made 2 bird shaped templates from the cardboard. You will need 1 large bird and 3 small birds (unless you want less or more). You will also need 3 cardboard wings and 1 larger wing. You can draw these free hand and then cut them in cardboard. Once you have your cardboard bird templates cover with colorful fabric and glue them down onto the burlap allowing about 2 inches for your grassy area. I used bugle beads for eyes and pipe cleaners for the legs but I think next time twigs would have looked so much cuter.

      For the grass you can either use moss,or Easter grass or like me I used a cleaning mitt that I got from the dollar store. It was green so I cut it apart and then glued it down it bits and pieces. I then added button flowers and green felt stems with bugle beads for the stamens (centers).

      Be creative and have FUN!!!