Tuesday, May 31, 2011

Bandanna Tote

You can make anything if you set your mind to it. Mom's remember these colorful bandanna scarves? Everyone has worn one around their head or neck at some point in their life, even the family dog! C'mon now admit it...you know you did.
DIRECTIONS
                                                                          You can purchase the handkerchief bandannas at any craft store like ACMoore or online at TAN'SCLUB (they offer wholesale prices)

This is how your bandana purse should look:

Monday, May 30, 2011

Fuzzy Desk Accessories

I love this idea. What teen doesn't love furry unique gifts? This is a fun project you can make for yourself or for a dear friend. You can find the directions here-FUZZY DESK ACCESSORIES
You can buy fur at places like: Amazon,J & O FABRIC STORE,BOTTOM DOLLAR, and my favorite DISTINCTIVE FABRICS
You can purchase artificial flowers at places like any dollar store,craft shop,Kmart ,Walmart etc.
So,save your old cans,cardboard and boxes so you can make this cute project.

Sunday, May 29, 2011

Friendship Bracelets

Friendship bracelets are fun and easy to make. My daughter learned how to make her first bracelet in third grade by her teacher, Mr. Pulvino. 

Friendship bracelets are one of the major symbols of Friendship. Once you tie it on your friend's wrist it should remain there until it falls off on it's own. You can make all sorts of bracelets in many colors and styles. The bracelets are fun to make at parties,summer camp or just on a lazy day with your friend.


FRIENDSHIP BRACELET DIRECTIONS

Having trouble understanding the written directions? Here is a series of eight videos to teach you step by step.

VIDEO OF HOW TO MAKE FRIENDSHIP BRACELET

Friday, May 27, 2011

Learn To Crochet

My Mom was an avid knitter and crocheter. She made all kinds of things from clothes to playful animals, afghans, Halloween costumes to blankets. She would give these items for gifts, donate them for church bazaars and even to the homeless. She and my Granny would sit in front of the television crocheting and knitting hardly looking down at what they were doing. My Mother and Granny were so good at what they did they could have probably did it with their eyes closed. My Mom's favorite was actually crocheting.My daughter was probably about 8 when she asked her Grandma to teach her how to knit or crochet. My Mom thought she was too young. Mom was also a left handed person so it was a bit awkward to teach my daughter too. Unfortunately by the time my daughter was old enough her Grandma had gone to heaven.

Years later my daughter still had the desire to learn. So she went online to You Tube, watched allot of video's and taught herself.
Here are some of the neat things she made in her early days of learning to knit. She was 16 years old last year when she taught herself to knit. Since then my daughter has knitted and crocheted all kinds of scarves,hats, animals, bootie's and gave them for gifts. She even made a crocheted Mickey Mouse costume that Baby Sophia is modeling in the photo to the right. She made this with no pattern and it was her first time ever crocheting. She has even donated hats and squares for various causes. I told her that her Grandma's hands must be looking out for her and guiding her along the way. Needless to say, I am very proud of her.The possibilities are endless of what you can do and make once you learn to crochet. So, follow these videos and you too will be crocheting in no time at all. Take your time and enjoy!! Remember you will make mistakes but that's all part of learning.

LEARN TO CROCHET
(I have included several video's as everyone has a different technique and you may prefer one teacher over another.)


Learn to crochet a pot holder---


Thursday, May 26, 2011

Learn To Knit

My Mom was an avid knitter and crocheter. She made all kinds of things from clothes to playful animals,Halloween costumes to blankets. She would give these items for gifts, donate them for church bazaars and even to the homeless. She and my Granny would sit in front of the television crocheting and knitting hardly looking down at what they were doing. My Mother and Granny were so good at it that they could have probably did it with their eyes closed.

My daughter was probably about 8 when she asked her Grandma to teach her. My Mom thought she was too young. Mom was also a left handed person so it was a bit awkward to teach my daughter too. Unfortunately by the time my daughter was old enough her Grandma had gone to heaven.

Sophia modeling her new hat and scarf
Years later my daughter still had the desire to learn to knit. So she went online to You Tube, watched allot of video's and taught herself.

Since then my daughter has made all kinds of scarves,hats, animals, bootie's and gave them for gifts. She even made a crocheted Mickey Mouse Costume which I will share in another posts. She has even donated hats and squares for various causes. I am very proud of her.

Here are some of the neat things she made in her early days of learning to knit. She was 16 years old last year when she taught herself to knit.   
Hat for baby my daughter made

A sweater my daughter made


Here are some learn to knit video's,you will learn to knit your first scarf. There are 6 video's in all. Don't get discouraged if you keep messing up everyone does. Take your time and enjoy!---

Tuesday, May 24, 2011

Tie-Dying

I love tie dye. Every year in elementary school my daughter would have field day and we would tie-dye shirts according to the colors of the countries that the teams were representing.

My daughter's team was Italy and another year it was Mexico so the shirts were almost identical. However we did some other shirts that year with beautiful colors.

Here are some instructions to make your own shirts.

Pre-wash and dry the garment. This will remove any impurities and bring it to the correct size. If dying indoors, cut open and lay out a few garbage bags for potential stains. Newspaper can also be used, but is less effective. Wear clothes and old shoes that you don’t mind getting messy.

TIE OFF SHIRT AND PREPARE FOR DYING:
There are so many different ways to tie off a shirt. Even if you try the same technique, you’ll never get the same design twice. Experiment with the following:

  • Stripes: Gather your shirt up into a tube-like shape. You can twist it for lots of white wrinkles, or leave it as is. Strap rubber bands all the way down the tube. The more rubber bands you add, the more white stripes you will have when finished!
  • Center Circle: For a centered circle on the front of the shirt, first lay the shirt out on a flat surface. Pinch a section right in the middle of the shirt and pull up toward you to make a tee-pee shape. Pull up more of the fabric for a larger circle. Close one hand around the base of the tee-pee and then tie it off with a rubber band. Twist the fabric you’ve sectioned off, and then add rubber bands down the length of it. The more rubber bands, the more circles.
  • Many Small Circles: For lots of small circles, pinch up fabric about 2-3”, insert a large marble (or Styrofoam ball) and tie it off with a thick rubber band or string so that the marble is secure.
  • Sunburst: Tie off a marble as instructed above. Use your pinky to measure about ½ inch behind the last rubber band. Tie off two more sections about a pinky-width apart. Tie another section 1 finger width after the last one, and try the last one at two finger widths.
  • Spiral: For a spiral design, simply pinch up a section in the middle of the shirt and twist it. Continue twisting until you have a spiral. Lay the spiral down on the shirt and curl the rest of the shirt around it like a tight nest. Take two large rubber bands and secure the nest so that it stays put.
Get yourself some Ritz dye or fiber reactive dye. (I prefer Ritz as this is how we did them at school but it looks easier too with the fiber reactive dye.) I will add some You tube videos so you can actually see the process.
Good luck and have fun with color!!!

Monday, May 23, 2011

People Puppets

Make one to look like you and one to look like all your friends.
You need:
  • Empty Paper Towel Tube
  • Tube From Paper Towel
  • Paint and Brush
  • Markers
  • Two wiggly eyes (large)
  • Ribbons
  • Scissors
  • Craft glue 
Glue a jumbo craft stick inside the empty tube for a handle. To make hair, cut strips down one side 4". Bend or curl the pieces around a fat marker. Trim. Paint the face and hair. Glue on wiggle eyes. Draw on details with marker. Glue on hair bows if desired.

Put on your own show for your Mom's and Dad's or even your friends.

Sunday, May 22, 2011

T-Shirts For Dad

Father's Day is coming soon.It's Sunday,June 19th here in the USA. But---did you know that in other countries Father's Day falls on a different day of the year.

Here is a link so that you can see when other countries celebrate Father's Day --Father's Day All Over The World--2011.

Here is a shirt idea for your Daddy for Father's Day. I don't have a picture of the one my daughter made her Pop-Pop years ago but here is one very similiar.

Father's Day T-Shirt


Here are some more links to other great gifts for Dad's and GrandPop:

Paper Weight

Note Book For Dad

Luggage Tags

BBQ Apron

Dad's Throne

Lady Bug Tie Tack

Saturday, May 21, 2011

Made By Me

I wanted to share some crafts that I made using Crayola clay. It's very easy to mold and it usually takes about 24-48 hours to dry. It depends on the thickness of the art piece.

 I am a single Mom and disabled. I can't afford to buy gifts so I like to make things. Last year I made all sorts of Christmas ornaments. I would like to share a few. This is what you can do with clay and a little paint.

As you can see the photo to the left is of the Pillsbury dough boy. He was pretty big and took about 3 days to dry completely. Once he was dry I painted him white and sprayed him with vanish. I then glued some wiggly eyes on him to make him authentic. He was a Christmas gift for my sister who adored anything with this character on it.
 The next ornament was of "Sponge Bob" Square Pants. Vince loves Sponge Bob and so I made this tiny ornament for him. It was about an 1 1/2 inches and so it was a little bit tedious to paint. By the way I use paper clips for the hooks. They have to be put into the clay before it hardens. You can see that I am holding it by the hook.

Needless to say,Vince loved the ornament. I also made "Back Pack" for his brother,Gippy and a "Bear" for Avi his other brother.
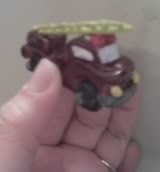
The next ornament was a fire engine. My Dad's Step Son is studying to be a fire fighter and so I decided to make him an ornament. I painted it with red fingernail polish and made the ladder out of toothpicks.


My last picture is of a winter scene. I call it "Penguins at Play". This picture doesn't really do it justice. The round dome behind the penguin is an igloo and it actually has a hole but you can't see the entrance. I have sparkle white glitter on the piece and so it's very sparkly. The penguin on the far right is sliding down a mound of snow and in front there are 3-4 snow balls.


If you are creative then you can create just about anything with this clay. You can purchase it just about any place. I got mine at Walmart but I also saw it at AC Moore which is a pretty big craft shop here on the East Coast. This is what it looks like and it costs about $9.00.

Friday, May 20, 2011

Stationary and Culture

I used to write allot of letters. I had pen pals all over the USA and in other countries too. Parents its nice to get kids involved in writing and learning about other cultures. Here is some ideas for cute stationary to begin their new hobby.

FINGER PRINT STATIONARY


Pen Pals Websites:

Students of the World

Youth Online

Surfnet Kids

Wednesday, May 18, 2011

Plant Pals Craft and other plant ideas

I thought this was just so cute. With spring here this would be a fun craft to give a parent,teacher or grandparent.

PLANT PALS

Terrariums
Painted Flower Pot
Butterfly Garden

Tuesday, May 17, 2011

Sunday, May 15, 2011

More Father's Day Gifts

I have been searching for father's day crafts. Here is one father's day craft that really stood out and I think Dad's will really like this stylish,cool hammer. It's a great craft for tweens and teens. PAINTED HAMMER

Here are some more really neat crafts that I found HAPPY FATHER'S DAY.

June 19th is Father's Day!!!

Name Plaque

This is a really simple project that I did one Saturday afternoon with my daughter. She glued her name to the wood ribbon but it could be a name, a simple saying or even just a word like Mom or Dad or I love you.

Materials Needed:
1 piece of wood ribbon (from craft shop such as AC Moore,Michaels,JoAnne's etc...)
Wooden Letters
2 Hearts of any type of ornamental wood such as music notes, hair clippers,football,cheerleading)
Craft Glue (it's more sticky)
Colored Paint
Spray Vanish
Ribbon
Duct Tape
Newspaper

Directions:
Lay old newspaper out on a hard surface (table). Paint the letters and allow to dry. Once they dry glue letters onto ribbon or whatever kind of board you chose. Allow to dry. Now have your parent take outside and spray with vanish to seal and protect your art work. Once the piece dries completely (usually 24 hours) take a piece of ribbon about 5-6" and using the duct tape secure each side to the back of the wood. Voila! Now you have your name plaque and it's already for hanging.

Wednesday, May 11, 2011

Fishy Swimming In The Water

This is a cute aquarium seen that my daughter made me when she was in elementary school. I have it hanging on my bathroom door.

Materials Needed:
8 small popsicle sticks
Cardboard square(I used the back of a notepad)
Craft foam (Blue,llight beige,green)
Craft foam fish
Sea shell
Wiggley eyes
Craft glue
Ribbon or a shoe string
Duct Tape

Directions:
  1. Cut cardboard  5 inches by 5 inches
  2. Glue blue craft foam to cardboard and then trim off anything extra.
  3. Cut beige craft foam (this will be the sand Should measuer about 1" high and 5 " across)
  4. Glue at the bottom,flush with edge
  5. Glue your fish,sea shells and starfish
  6. Glue  wiggley eyes on the fish
  7. Now glue the popsicle sticks around the perimeter of the picture
  8. Cut a piece of ribon 5" in length and tape with duct tape to the back of the art work.
Mom and Dad should love these fish. They are clean andnd----you don't have to feed them either!!

Monday, May 9, 2011

Picture Frame For Dad

I know we just celebrated Mother's Day and it's not even June yet but I wanted to post this early enough so you all have time to work on projects for Father's Day. We all love our Dads too and so here are some ideas for gifts for the Daddy in your lives.

Materials Needed:
Cardstock or a piece of poster board cut into a 5x7 (You can go as big as you like)
Glue
photos

Instructions:
Draw two D’s and an A shape onto the card/poster board and cut out. Use a small pair of scissors to cut out the inside of the letters, too (younger children will need adult help or supervision).

Decorate your letters. Embellish your letters with any kind of  stickers, gems, ribbons, sequins, pompoms etc...

Glue a photo to the back of each letter.

Layer the letters so they overlap slightly, spelling out the word "Dad", and glue together.

You can laminate to make it last longer

Links to other fun ideas:


Sunday, May 8, 2011

Happy Mother's Day


I won't be posting a craft today. I have a date with my very special daughter. 

To those of you who still haven't made Mom a special gift here is a link to two crafts--HANDPRINTS and STEPPING STONE .

I want to share a special poem I wrote when I found out I was going to be a Mom.


Francessca on her 2nd birthday

My Daughter
 By MJ Daley-Prado


My belly is growing
I feel you moving inside of me
I can hardly contain myself knowing
that soon you will be here
I have dreamed about this moment all my life
Now I am holding you in my arms
Dark brown hair
Your little fingers and toes
I stare at you in disbelief
A moment in time that I will never forget
Precious and truly a gift from God

My daughter
Yes...I can hardly believe
my dreams have been answered
I am a Mom....Your Mom

I will love you forever!


Again---HAPPY MOTHER'S DAY!!!

Saturday, May 7, 2011

Stepping Stone

Like most people I love gardening. I have all kinds of little ornamental things in my garden,the majority being gnomes. In fact my daughter always kids me about my gnomes and it isn't that I love them it's just that they are usually cheap at the dollar store and so this is how I accumulate so many.

My daughter however got tired of all my little gnomes and ladybugs staring at her so she made me a beautiful stepping stone. I tried to post it on here but for some reason it wouldn't send. (I will add it when I can)

Here is a really neat craft idea for anytime of year. Be creative and add lots of embellishments. You can even write a name in the plaque and give it for a special gift to someone you love.

You will need:
Plaster of Paris
Aluminium pie case
Shells, pebbles, acrylic gems, marbles or other water-resistant treasures to decorate. You could even use small plastic toys such as figures or toy cars.(Many of these things you may have laying around your home and some can be bought at your local dollar store)


Instructions:
  • Make sure that you have a covered surface to work on and your children have overalls to protect their clothes. Gather all your materials in advance, as Plaster of Paris dries quickly.
  • Mix up the Plaster of Paris in an old jug according to the instructions on the packet. Pour into the pie case.
  • Carefully lay your decoration on top (note: they will sink a little no matter how carefully you do this; if you are too rough they will sink a lot!)
  • Leave to dry for a couple of hours and then remove the plaque from the pie tray.
  • Dig a hole in the garden and pop in the plaque. Back-fill with soil so that the top of the plaque sits level with the flower bed.

Friday, May 6, 2011

Bubbles, Bubbles and More Bubbles

My daughter,nieces and nephews all loved bubbles. My daughter would play jumping high trying to catch it. She would giggle and screach with laughter. Something so inexpensive that brought her hours of joy (and me too for that matter!)

It wouldn't be spring if we didn't get outside and blow some bubbles. The bigger the better!! Last year we went to a show at our local library. I don't recall her name but she made some huge bubbles.
Here is a video that shows some of those epic bubbles.
 Here's a bubble recipe to make up your own bubbles. After you and your Mom make it store it in jars or bottles overnight. Let sit for 24 hours and it will be even better.


Bubble Recipe
·        1/2 cup of dish detergent
·        5 cups water (If your water is very hard consider using distilled or bottled water)
·        2 tablespoons glycerin (It's available at your local  pharmacy)

Mix ingredients together very slowly and carefully. Pour into storage containers and let sit for several hours.

You can also make your own wands--
·        Wire coat hangers or floral wire, pipe or cleaners
·        You can also use large drinking
·        Anything with round holes in it (Spoons, string etc...


Wednesday, May 4, 2011

Mother's Day or Anytime

With Mother's Day approaching I wanted to share with you a very special sentimental gift that you can make for merely pennies yet to your Mom it will be priceless!

When my daughter was in elementary school she made me a this very craft for Mother's Day. You can't see it well from the photo but in the center is a beautiful poem about handprints. If you Mom (or even Grandma) is a sentimental mush like me trust me she will love,love,love this and treasure your handprints forever!! 
Materials:
  • Large piece of colored poster board or colored stock (Needs to be at least 10x13)
  • Clear laminating film
  • Colored tempra paint (only need 1 color)
  • Printer to print out poem
Directions:
  1. Print out poem and glue onto the center of the board.
  2. Quickly put some paint onto your hands either via a paintbrush or sipping them into the paint (you can put some into a flat pan,either way works)
  3. Now carefully lay your hands down onto the board putting one hand on each side of the board.
  4. After it is completely dry you can have the child write his name in the middle of the art work and maybe sign it "I love you (insert name).
  5. Once it is dry have someone help you laminate it. Be very careful as you only get one chance to cover it---it sticks like molasses!

Click onto link and the poem will open. When it opens hit Print. If you have any problems please leave me a message so I can repair it. Thanks!!

Tuesday, May 3, 2011

Mod Podge Stool


Mod Podge is simple to do. I have made collage pictures, trays, chairs etc..Select your theme and then either use some real photograpghs that you have laying around or select a bunch from some magazines.

For this stool my daughter chose her favorite animal ----DOGS! She actually mixed it up using a few photo's of our dogs and then a bunch of magazine photo's of all kinds of dogs. It's a fun project and it makes a terrific gift for anyone, including yourself!!

Materials Needed:
  • A wooden stool (from any craft and hobbie shop such as AC Moore,Michaels etc...)
  • Mod Podge glue (Or you can make it yourself using craft glue--I will give recipe later in this post)
  • lots of pictures
  • A Sponge paintbrush or a regular large soft paintbrush
  • An old plastic tablecloth or some newspapers
Directions:
  1. Spread out old cloth or some newspapers on a table
  2. Set your stool on top of the cloth/newpapers
  3. Spread one later of glue onto surface of stool and place pictures where you want them to be
  4. Once pictures are in place you need to paint over them with them mod podge glue
  5. Let it dry making sure all corners are sticking
  6. Once it dries you will want to repeat step 4 at least 2-3 more times.
  7. It will dry very shiny and hard
Make it yourself Mod podge Glue
  • Buy any craft glue
  • An old jar with a lid
  • water
Empty the contents of your glue into an empty glass or plastic jar.
Now fill the empty glue bottle with water 2 times and pour contents into jar. Place the lid on the jar and shake to mix well. Voila! Modpage glue.

Foam Brushes

Mod Podge Glue

Sunday, May 1, 2011

Barbie Furniture

This is a project for Mom.,and possibly some Dad's.

 I didn't have money to go out and splurge on toys for my daughter. I am a single Mom and so I  put my thinking hat on and I thought to myself why not make my daughter a house and furniture. This was a really cool project. It took a few weeks to do but it was all worth it!!

I made all sorts of furniture ranging from couches, beds, bunk beds, tables, chairs, a vanity, chaise lounge etc... It was allot of fun and enjoyment.

When I finally gave the furniture and house to my daughter she and her friends would spend hours playing Barbie's. I heard them giggling and sometimes fussing over who was going to use what piece of furniture. All the neighbor kids thought it was so cool that Fran's Mom makes Barbie stuff. It became so popular that I began making things for gifts because other children were without furniture or houses for their Barbie.

Maybe you are creative like me. Use your imagination and decorate any which way you choose! Have fun with it!!!

Materials Needed:
·        All different sizes of cans and boxes---The boxes need to range from little gifts boxes to cereal boxes to Pringles chip cans, vegetable cans.
·        Some sturdy cardboard
·        Utility knife
·        Duct Tape
·        Fabrics (all sizes and colors
·        Lace, ruffles, trims for fabric
·        Glue Sticks
·        Glue Gun
·        Polyester Filling
·        Popsicle Sticks
·        Pieces of foam, dollar store foam curlers, sanitary pads (all these make great fillers for sofas, beds and pillows.
·        Crafts Glue
·        Tiny artificial flowers
Directions:
·        Choose what you are going to make and secure boxes in place.
·        Once secured you can begin covering your couch in fabric
·        Then decorate and put the final additions on your piece using ruffles, trim etc...
**When you are done with the fabric what I like to do is I use popsicles sticks and I will glue them onto the back of the couch to make it stronger as well. You can do this before or after the fabric is added.
Below are some of the neat things that you can make.


Pringle Can Chair--
This makes a cute chair.
Materials Needed:
·        Pringle Can
·        Cardboard
·        Glue Sticks
·        Glue Gun
·        Utility Knife
·        Duck Tape
·        Fabri,ruffles,etc..

Directions:
·        Cut about 1/2 of the Pringle can off.
·        Cut 2 pieces of cardboard on a circle
·        Glue to Pringle can
·        Stuff with fabric
·        Now you are ready to cover in fabric


Bed Directions---
·        I use cereal boxes for a double bed and Kleenex boxes for single beds.
·        You want to secure it and make it sturdy so it's best to stuff the boxes with newspapers.
·        Once you do this then cut 2 pieces of heavy cardboard and glue one on the top and one on the bottom of the box. This will make it very stiff and secure.
·        Now measure the end of your bed and cut 2 pieces, now glue them on for your headboard.
·        Once you secure your boxes and headboard then you can cover in fabrics of your choice.
·        Add ruffles and lace for trim.
·        Make pillows out by covering either a sanity pad or some larger foam rollers


Bunk Beds for Little Kelly Dolls
Materials:
·        2 Small Kleenex Boxes
·        Cardboard
·        Popsicle Sticks
·        Glue Sticks
·        Glue Gun
·        Utility Knife
·        Fabric
·        Duct Tape
·        Fabric

Directions:

Look at illustration.
Glue boxes together and then decorate with Fabric.

Directions:


For Table
·        Cut 2 pieces of Cardboard in a 3x5 to use for a kitchen table.
·        Glue together
·        Now glue Popsicle sticks on top or cover in wood fabric.
·        Glue Popsicle legs onto table. (Sit doll on chair so that you can determine where to cut the height.
For Chairs--
·        Use a small gift box
·        Cut 2 popsicle sticks to use for the front legs
·        Use 2 ful length sticks for the back of the chair.
·        Cut 2 cardboard squares to use for the back of the chair
·        Once you have everything tapes and glued into place you can begin decorating with fabric


ENJOY!!!